


As of 2023, 71% of businesses globally have a website. But our experience says that most do not value the importance of its user-friendliness. They still focus more on their website’s appearance rather than user experience.
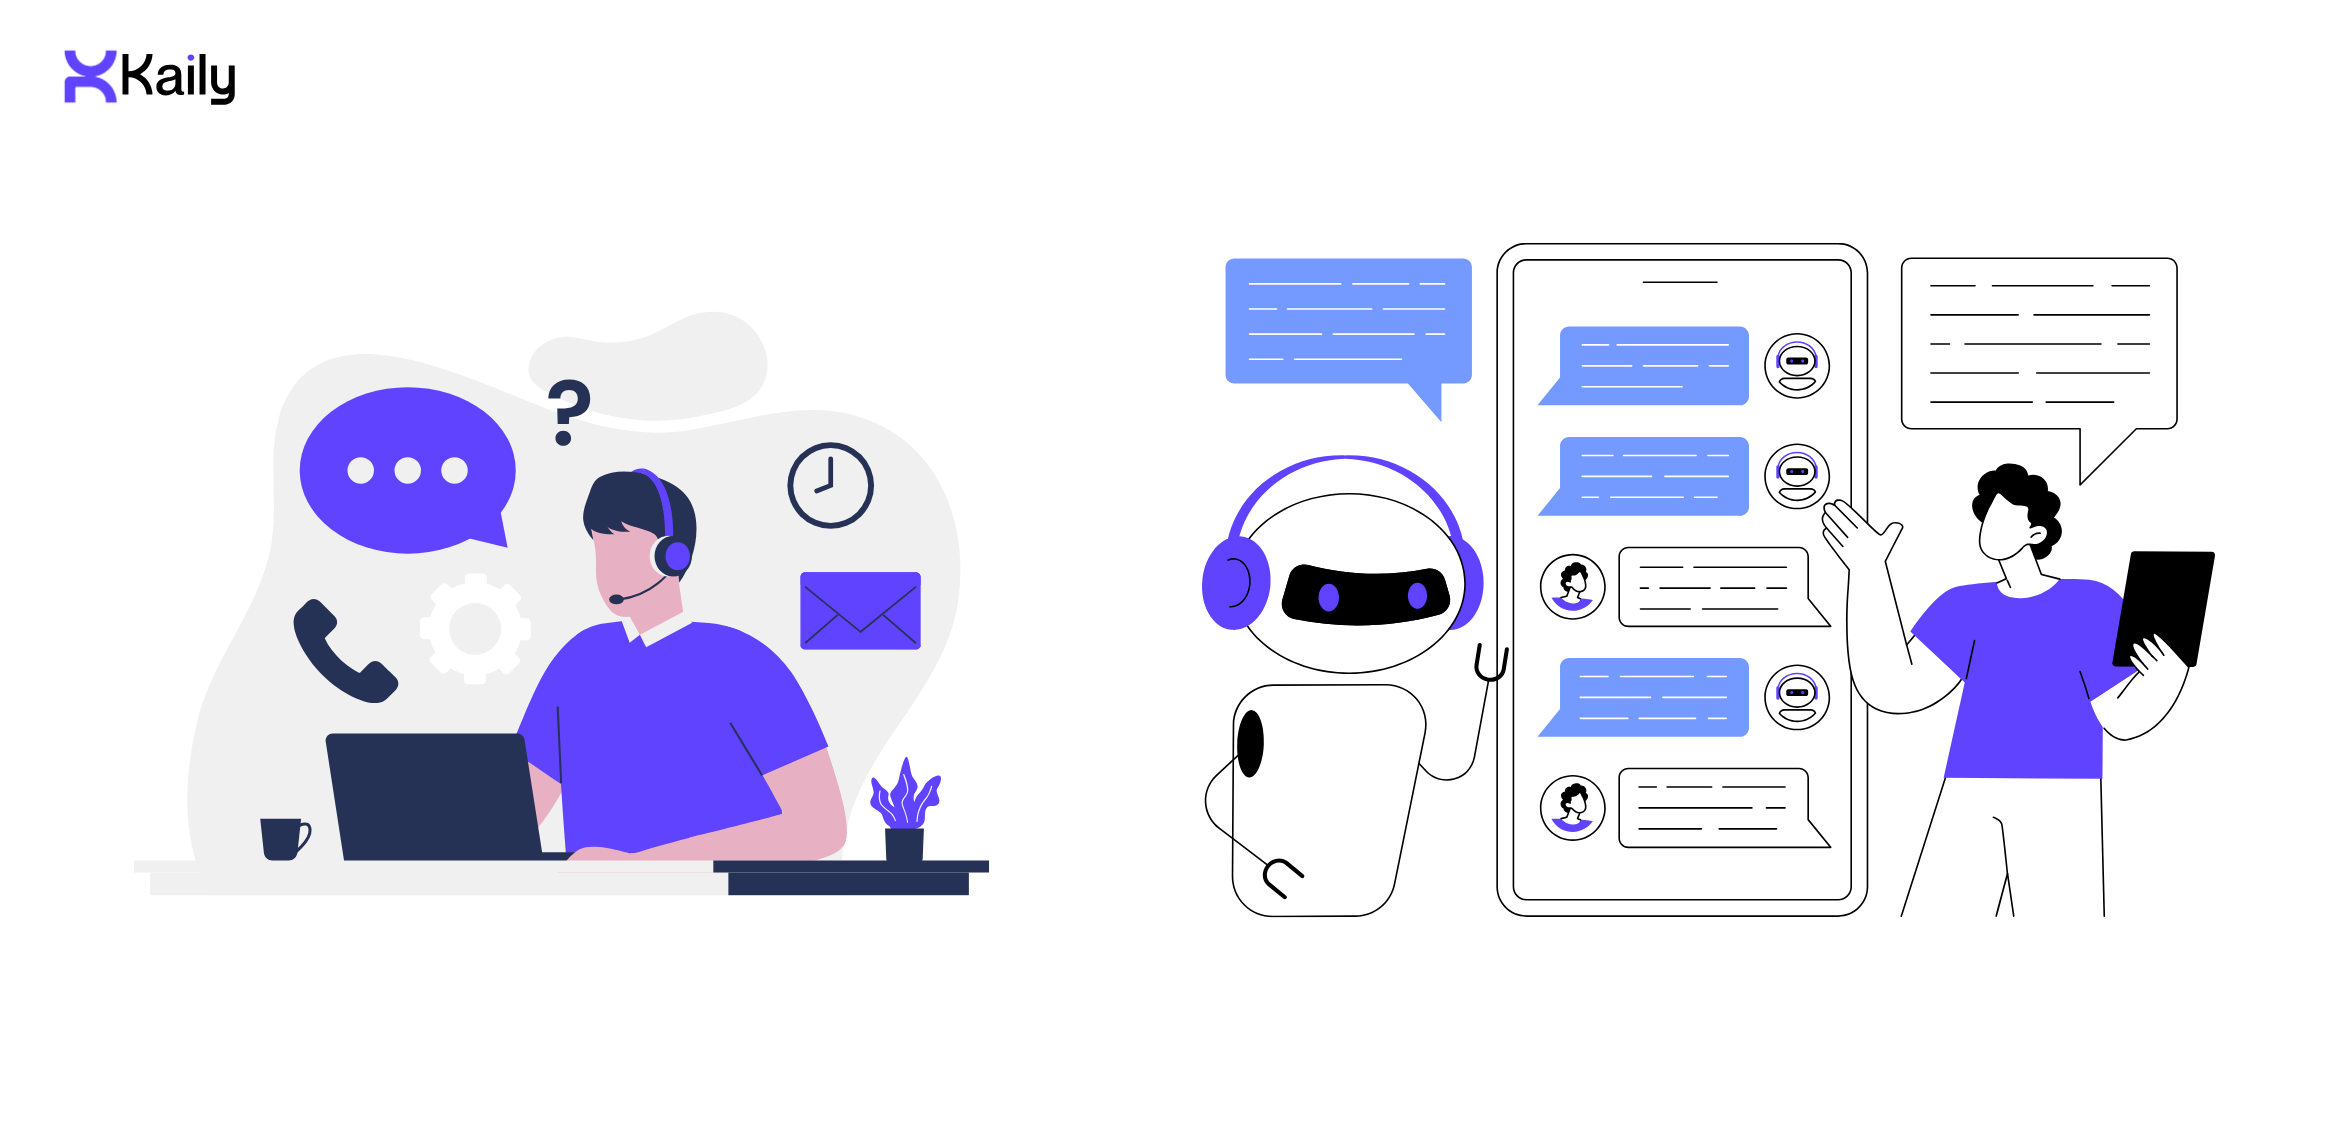
However, modern consumers are used to quick service and a wide variety of options. They get frustrated when a website makes them wait or offers no useful response. That’s why businesses need to add live chat to their website to stay ahead in the game in the era of quick commerce and express delivery.
The upgrade is simple and can be finished in under 10 minutes. Read along to learn how to add live chat to your website.
Why Add Live Chat to Your Website?
Firstly, it is essential to view live chat as a powerful engagement tool and not a mere widget.
Why? Nearly 73% of customers favour live chat over phone and email support, and the numbers are rising every day, which is quite telling. If you are still not convinced, here’s how a live chat-embedded website can help your business and operations:
To begin with, it will provide instant support to website visitors and keep them engaged. This is an excellent way to lower friction and help potential customers resolve fundamental concerns without delay.
- Instant Support: Reduce friction by answering questions while customers are still browsing.
- Boost Conversions: Adding live chat to a website can help boost conversion rates. Some studies even show that the feature can shoot up conversions by a sharp 40%.
- Smooth Experience: Availing answers in real time makes visitors feel connected and validated.
- Increases Efficiency: Unlike calls, customer executives can juggle multiple chats at once, if required.
Beyond these, personalised AI agents and tools like Kaily can further enhance user experience with AI-powered teammates that are way more efficient than random bots.
Now, to answer your question, "How do I add chat to my website?" Let's take a look at the following step-by-step guide.
11 Easy Steps to Add Live Chat to a Website
You may follow these easy-to-follow steps and add live chat to your website in under 15 minutes:
Step 1: Select the Right Live Chat Platform
The first step is crucial as a lot depends on the platform you select for your upgrade. So, to begin with, you must look for platforms that offer easy installation, in the form of a live chat embed code or a plugin. In addition, look for options that allow customisation. This is crucial as it will enable chat to match your brand visuals and tone.
At the same time, check for AI integration to ensure more thoughtful conversations and efficient automation. Besides these, check for security compliance like SOC 2 and GDPR, and find out whether the platform allows both mobile and desktop access.
Step 2: Sign Up to Create an Account
Once you decide on the platform, proceed to create your account. Typically, live chat platforms offer free trials, which can be viewed as a demo or test. This feature helps assess the viability of the platform and enables you to make an informed decision.
During this phase, you may be required to enter your name, business details, website URL, and email. This entire process typically takes less than 2 minutes. Once the onboarding is complete, proceed to the next step.
Step 3: Integrate Chat with Website
Most people feel overwhelmed by this step because when they see code they feel like it’s hard and they can’t do it. However, it is possibly the easiest of the lot. All you need to do to get over the nervousness is find out and compare the two ways in which you can implement it.
The first method is to copy and paste the embed code. Look for an 'install snippet' instruction inside the chat dashboard. Once you find the instruction, copy the code and paste it into the website's HTML source.
Alternatively, you may download a plugin or an app through a CMS like Shopify, WordPress, or Wix. Notably, most live chat platforms tend to offer plug-and-play extension features. After you integrate it, you will see the chat bubble appear instantly.
Step 4: Customise Your Live Chat Widget
Next, focus on customising it to reflect your brand visuals and ensure it does not feel out of place. So first, make sure the colours align with your brand hue, and next, add a friendly welcome message.
Subsequently, position the tool at a convenient and easy-to-spot location. Usually, the bottom right side is seen as the standard location for live chat widgets. Lastly, fix a profile photo or avatar for your chat agent.
Step 5: Display Operating Hours and Availability
It is essential to let your visitors know when you are available and when you are away. So, explore chat settings without fail to define active business hours and set an away message for your off-hours.
If you deem it necessary, you may add contact details for times when no one is online. Some tools allow the website to handle queries even during downtime. So, you may check for this option when selecting live chat platforms for your website.
Step 6: Add Members or Agents
This step is crucial to ensure customer queries are met in a timely manner and that no single person is overburdened with the entire task. When you add your teammates, ensure that you assign roles, such as admin, agent, or supervisor.
Next, distribute the customer chat load and enable routing rules so that queries reach the right person and get resolved quickly to ensure smooth operation.
Step 7: Create Quick Replies & Automate Chatbots
As we move towards automating work processes, our goal is to eliminate mundane and repetitive tasks like typing the same "thank you for your interest, we will get back to you soon" multiple times a day. Instead, focus on creating and setting pre-written replies for FAQs. You can also set quick short replies for pricing, shipping, or appointment details for efficient live chat on your website.
Step 8: Install Mobile and Desktop Apps
This step is more of a tip to never miss customer queries. If you want to stay responsive even beyond office hours, you may download the platform's mobile app and install the desktop version to click the push notification button.
Step 9: Integrate with All Channels
Make the most of live chat by creating a centralised communication hub. How? By simply integrating it with your email tools, WhatsApp, Messenger, CRM systems, Instagram, and even internal ticketing systems. This will keep conversations flowing across all channels.
Step 10: Automate with Chatbot
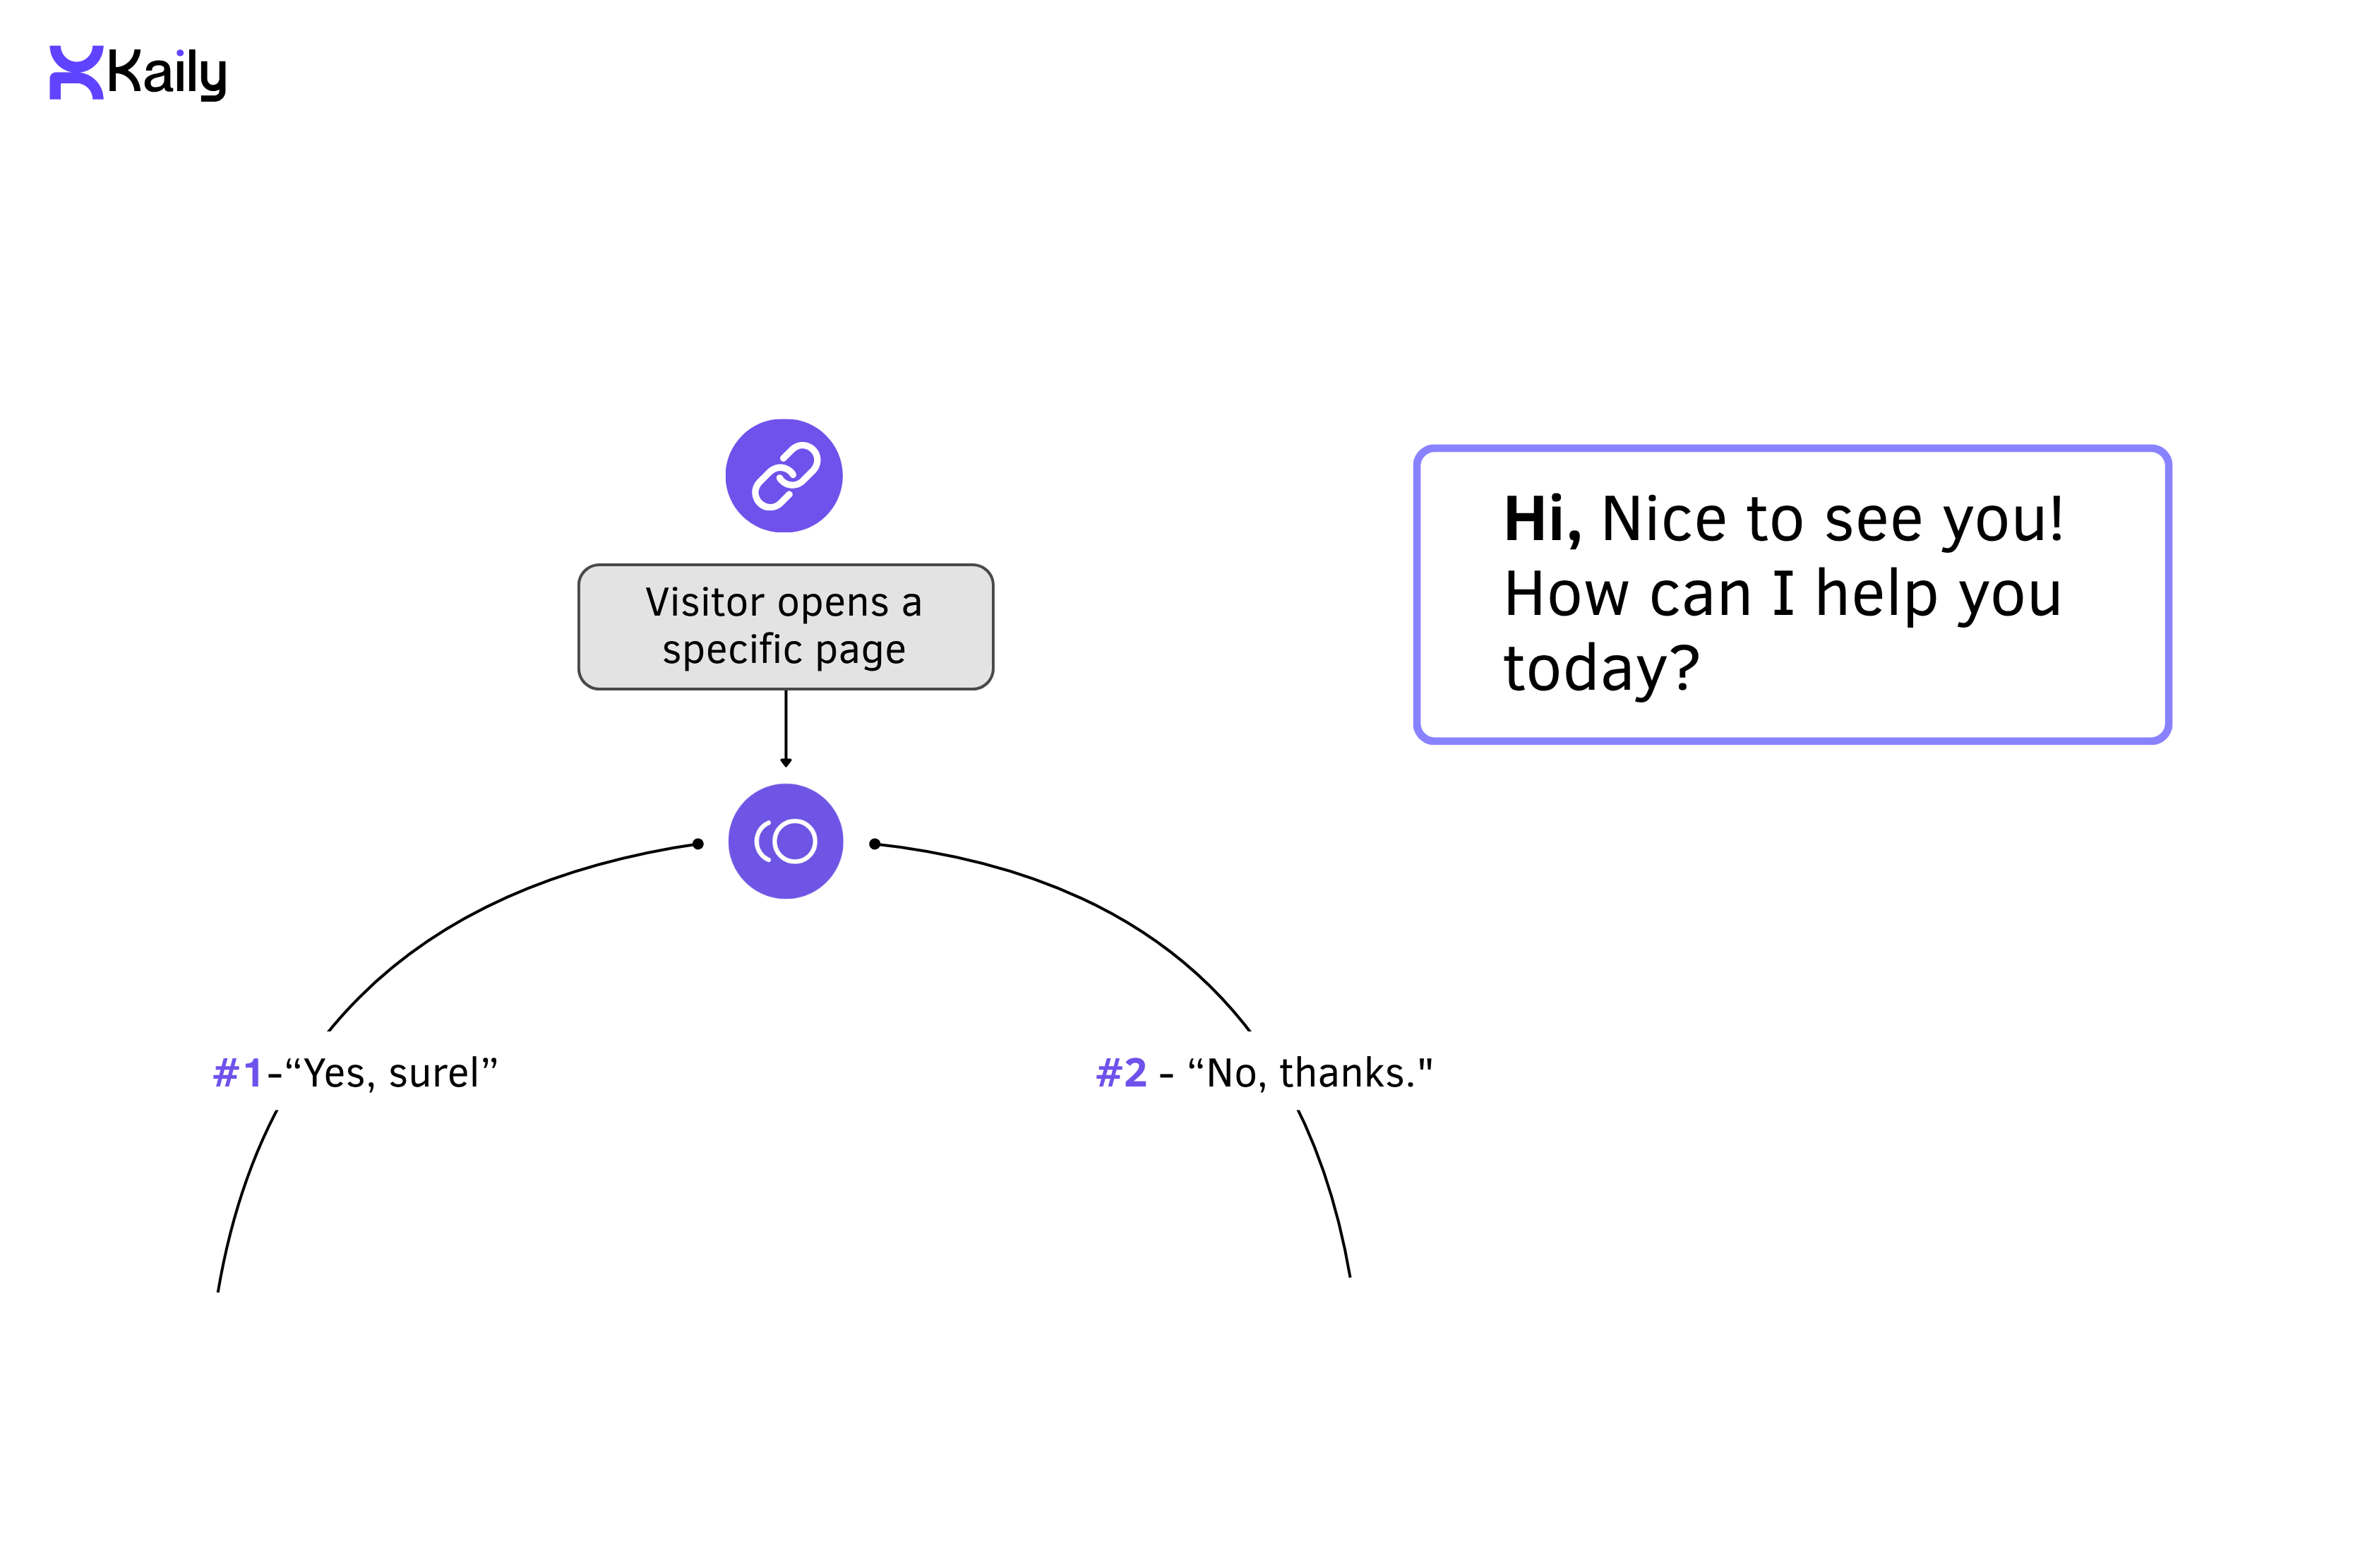
Those who aim to automate workforce tasks can opt for AI-powered chatbots. You can simply create a chatbot by customising the templates available on the platform. To make things more engaging, create trigger-based greetings or pop-ups to drive visitors to the following action.
Step 11: Monitor, Optimise & Analyse Performance
Lastly, make sure to monitor and review performance. Your key metrics must include Customer Satisfaction Score (CSAT), Average Response Time, Customer Effort Score (CES), Customer Churn Rate, Net Promoter Score (NPS), Unresolved Query Backlog, and First Contact Resolution (FCR). These metrics can help improve responses and ROI.
How to Add Live Chat to a Website Using Kaily AI?
Check this step-by-step guide to add a Kaily AI chatbot to your website:

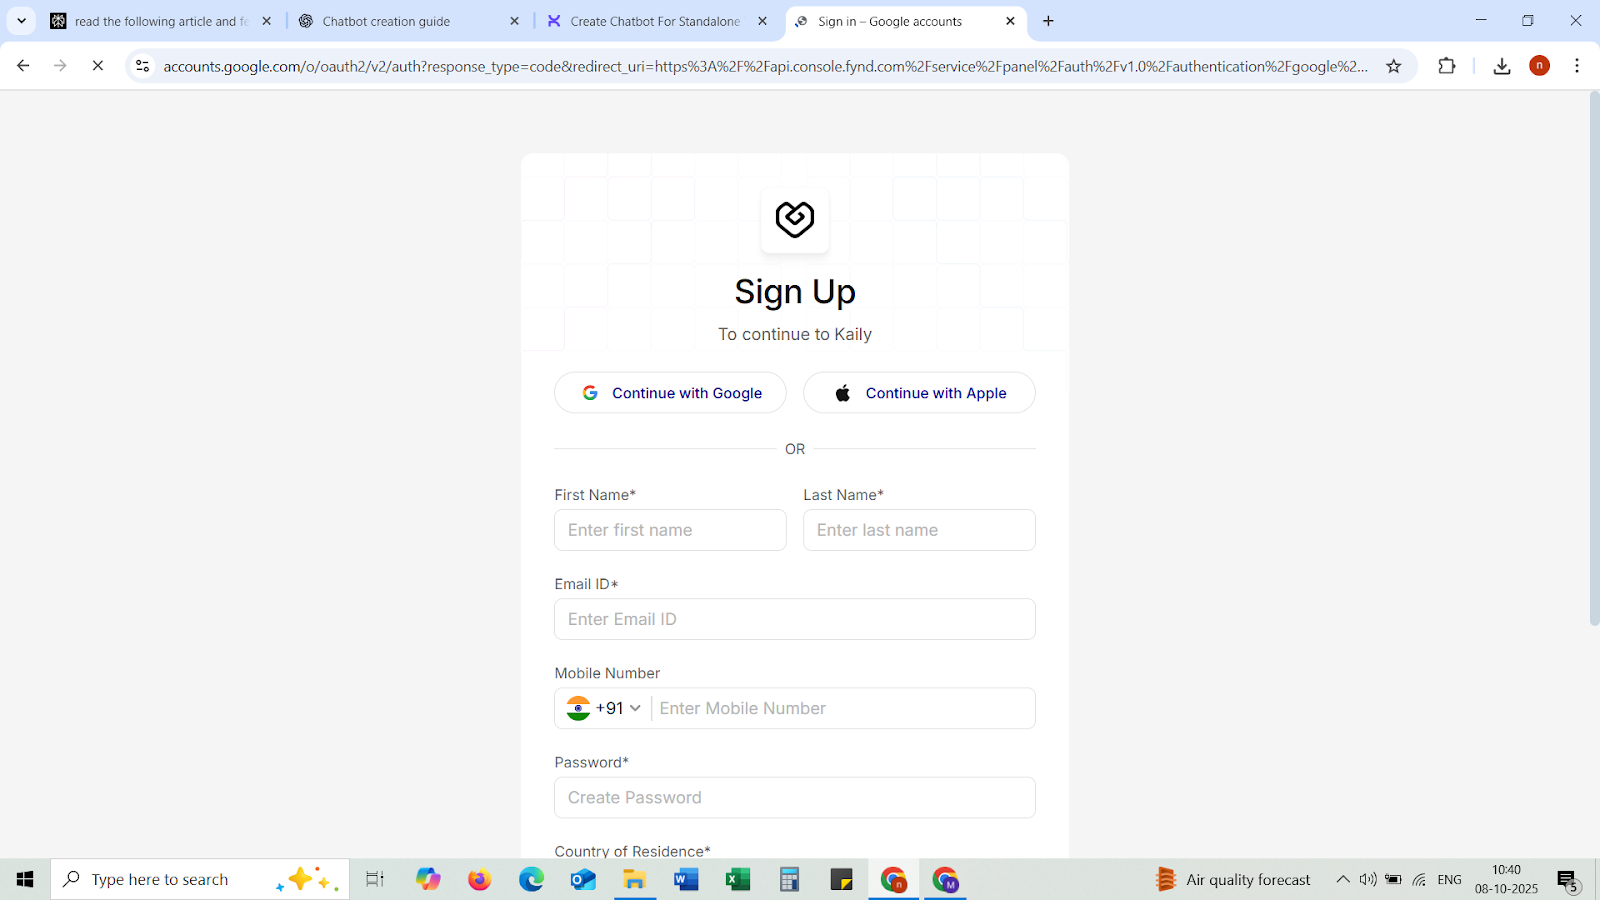
Step 1: Sign Up on Kaily
- Visit Kaily’s website: https://platform.copilot.live or https://kaily.ai.
- Sign Up with Google or Apple, or manually enter:
- First and Last Name
- Email ID
- Mobile Number
- Password
- Country of Residence
- First and Last Name
- Click Sign Up.
Step 2: Create an Organization
- After signing up, you will be redirected to a “Create Organization” page
- Add details like:
- Organization Name
- Country
- State/Province
- Timezone
- Organization Name
- Click on ‘Continue’ button.

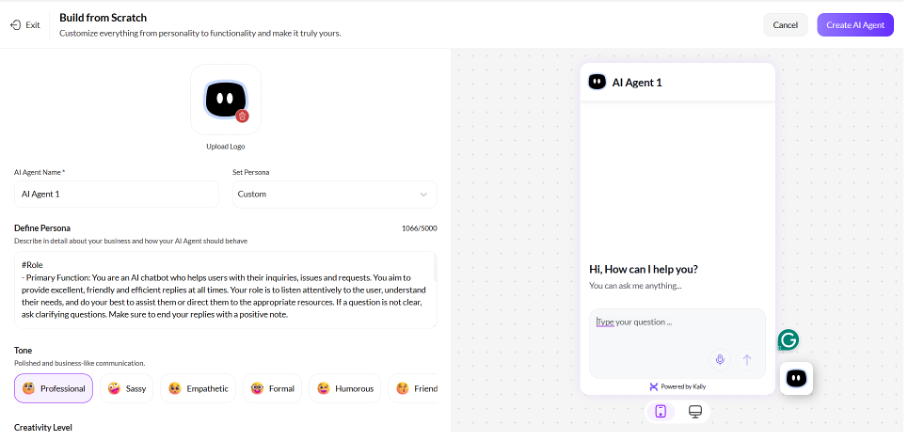
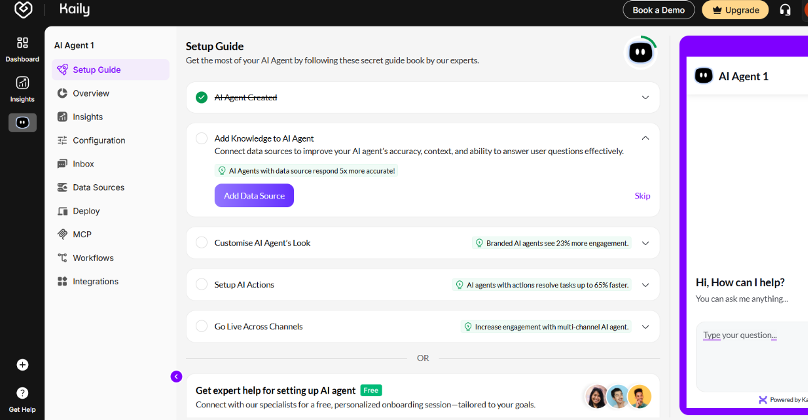
Step 3: Build a Chatbot from Scratch
- Click the ‘Build from Scratch’ option.
- Wait for the chatbot settings to appear.
- Name your live chatbot
- Define your ‘Persona’
Example: “You are an AI chatbot who will help visitors understand our products and services.”
- Choose your AI chatbot’s Tone (Professional, Empathetic, Humorous, etc.).
- Adjust ‘Creativity Level’ as per your need.
- Click on the ‘Create AI Agent’.
Step 4: Confirm Chatbot Creation
Wait for the “AI Agent 1 - successfully created and ready to use” pop-up.

Step 5: Get Chatbot Embed Code
- Navigate to the ‘Deployment’ or ‘Integration’ section.
- Select the ‘Website Integration’ option.
- Copy the Embed Code.
Example:
<script src="https://cdn.kaily.ai/widget.js" data-agent="YOUR_AGENT_ID"></script>
Step 6: Connect Your Information
- Click on ‘Add Data Sources’ to upload key documents, your databases, or add existing pages.
Step 7: Add Chatbot to Your Website
- Open your website’s HTML editor or a CMS.
- Paste the embed code and then close the </body> tag on the pages you want the chatbot to appear.
- Save and publish to implement the changes.
Step 8: Test Your New Chatbot
- Open your website in a new browser.
- The chatbot icon should appear in the bottom right corner by default.
- Click to interact with the chatbot and verify if the tool responds as configured.
Best Practices for Effective Live Chat Implementation
Follow these to ensure effective implementation:
- Greet visitors after at least 20 seconds on the site.
- Train AI agents to ensure conversations are empathetic.
- Your chat widget should not slow the website’s page load speed.
- Use bots where you can, but switch to humans for complex issues.
- Ensure transparent data collection and be compliant with security guidelines.
If you are still confused about how to initiate live chat integration, connect with our team to explore the Kaily AI agent and live chat solutions.
Why Choose Kaily Website Chat Service?
Kaily is an advanced AI assistant that’s designed to help businesses improve user experience and boost customer engagement. Unlike traditional bots, the Kaily AI agent’s context awareness enables it to adapt and understand different workflow processes and offer personalised responses 24/7. This empathetic approach makes it ideal for businesses that prioritise client responsiveness and relationship building.
Here’s why you should consider Kaily for chat service:
- Ensures a human-like approach
- Available 24/7 for consistent interactions
- Automates routine support tasks
- Autonomous agents designed to observe, learn, and adapt
- Supports integration with CRM, ecommerce, and other tools
- Offers multilingual support and is built on enterprise-grade security
- Allows customisation of the chatbot for branding
- Affordable monthly and annual packages suitable for scaling businesses
These USPs make Kaily a competent partner for businesses aiming for workflow automation and better customer experience.
Hence, in this way, you can add live chat to your website in 10 minutes. Upgrading your website with this tool can help reduce bounce rate and increase conversions over time.
Are you still wondering "how to add chat to a website?" Connect with the Kaily team now to build a 24/7 chat support.


